 Believe it or not, Spring is just around the corner, and with it comes the first foray to the track. Now is the time to do some of the basic chores necessary to ensure a trouble free year of Spring/Summer/Fall fun.
First, let's get the materials we need to do this basic maintenance. Get the following items:
- Six quarts of good quality 5W-30, 10W-30, 10W-50, or 5W-50 synthetic oil. Synthetic oil provides better low temperature cranking (thus saving bearings and wear) while also providing resistance to coking and good high temperature protection.
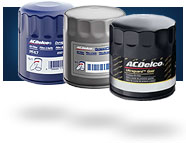
- One oil filter AC PF47. Optionally, an AC PF52 may be used for a little extra filter area. Both these filters have an antidrainback valve that will trap the oil in the filter, thus providing a small reservoir of oil for initial starting. Don't use the "equivalent" generic filters, since they often are of inferior materials and lack the antidrainback valve. It's worth a couple bucks more to get something of known quality (AC Delco "Ultra" series, Purolater, Mobil 1, and Wix are all good choices). Also, it's worth it to consider the "Biggie Oil Filter" upgrade kit that allows you to use the bigger filter (as used on the 455s).
- Transmission filter and pan gasket set for the 200-4R. The Fram part number is FT1057B.
- Five or six quarts of Automatic Transmission Fluid. I recommend Type F fluid for heavy duty use, since it actually will make the transmission shift a little firmer. Dexron III can be used for purely street driven cars. If you do choose to use Type F fluid, don't worry about it mixing with Dexron III that might be in the transmission. It won't cause any problems, and the Dexron III will eventually be flushed out as you continue to change the fluid with Type F.
- Six AC spark plugs. Cars running 12.99-13.50 seconds or faster should use R43TS or CR43TS plugs (one heat range colder) and 12.00 and faster cars should use AC R42TS or CR42TS. The CR designated plugs have a heavier electrode (the "C" stands for "Commercial"), but are otherwise the same as the R42TS plugs. Autolite 24 plugs are also a good choice.
- A good set of spark plug wires would be a good idea while you go through the trouble of changing plugs. Get some dielectric grease for the boots and to protect the coil pack terminals while you're at it.
- Two quarts of Hypoid Gear oil. I recommend a good quality synthetic, such as Red Line. If you choose to use normal Hypoid Gear oil, and have a positraction rear end, be sure to get some "Equa-Torque" or similar positraction additive. The synthetic gear oil usually does not require this additive, but if you get chatter or noise when cornering, try a bottle of the additive. Also, take a look to see what the synthetic manufacturer recommends.
- AC Fuel Filter part number #GF481. These filters are available in places like K-mart and local auto parts stores for around $10.
- Two or three cans of oxygen sensor safe carb cleaner.
- One AC Positive Crankcase Ventilation (PCV) valve AC #CV893C.
- Air filter (for those with stock air cleaners) or a K&N cleaning kit for those with K&N cone type filters. My setup has a foam filter that just requires a "bath" in a bucket of soapy water and then air dried (I use my Wet/Dry Shop Vacuum to speed the process). Then the filter is treated with a light coating of WD40 or K&N filter oil.
 Start by doing the simple things first, like changing the oil. A good practice is to change the oil every 2500 or 3000 miles or 6 months (whichever comes first). Jack the car up, using the manufacturer's recommended jacking procedures and support the front of the car on jack stands or a good set of ramps. If you are using ramps, make sure you are using the type with the extra support on the sides to tie the back of the ramp and the front of the ramp together. This avoids potential collapse of the ramp. Drain the oil and remove the oil filter. Reinstall the drain plug. Make sure that when reinstalling the oil filter that you coat the rubber "O" ring on the filter with new oil to ensure that it will tighten correctly on the filter housing on the engine. It is also a good thing to fill the filter with as much oil as you can to help avoid a dry restart. Fill the engine with oil.
![]() *** TIP ***
*** TIP ***
Be sure to detach the orange wire up by the battery before starting the engine after you change the oil. After disconnecting the wire, crank the engine over for 30-45 seconds to build oil pressure and to fill the oil filter with oil. Reattach the wire and start the car. This prevents starting the car with dry bearings.
Also, replace the PCV valve at this time. Use the AC type OEM valve, since there have been people reporting problems with other brands of PCV valves. Most of these problems have to do with emissions tests, which we in Nebraska are not subject to, but it isn't worth saving a couple pennies to skimp on the cheapo PCV valve.
Scrape off all excess gasket material and ensure the new pan gasket lays into place. Remove the filter and make sure the rubber "O" ring on the filter neck comes out of the transmission with the filter. If you don't see it, you may have to fish around up in the neck to find it and remove it. You may have to use a small screwdriver or a scratch awl to pry it out. Install the new filter, ensuring that a new "O" ring is in place.
Reinstall the pan and pan gasket, being careful to ensure that the gasket is perfectly aligned and not pinched anywhere. Be careful not to over-tighten the pan bolts when reinstalling the pan, since it can warp the gasket sealing surface and cause leaks.
Now, add 4 quarts of fluid via the dip stick tube. I find that a transmission funnel helps this procedure alot. The funnel has a flexible hose that goes into the dipstick hole and allows you to hold the funnel at a more convenient angle for pouring. Put the car in PARK and start the engine, slowly add fluid until you reach the full mark on the dipstick. Remember to add the fluid slowly and check the dipstick often to ensure that you don't overfill. When I think I'm close to full, I usually go for a short drive around the block to allow things to circulate and warm up and then check the fluid level again and add as necessary.
![]() ** TIP **
** TIP **
While you have the pan off is a good time to install a drain plug in the pan. These plugs are available from many sources, including mail order places such as ATR and chain auto parts stores like Super Shops and Champion Auto. Just follow the directions on the package to install. This allows you to change fluid more often without all the mess and hassle of dropping the pan each time. However, every other fluid change you should drop the pan and install a new filter.
It's a good idea to use JB Weld or black RTV to seel the edge of the filter where the metal part meets the plastic. Seal all around the edge and MAKE SURE THAT IT IS COMPLETELY DRY before reinstalling. This helps prevent aereation of the fluid under hard acceleration.
 Pull the back cover off the rear end carefully, making sure to just crack the bottom of the cover loose from the housing to let the fluid drain first. This is a good chance to inspect the condition of the gears and C clips. Look for unusual wear patterns on the gears or metal shavings.
Once the lube has drained completely (pretty foul smelling stuff, huh?), use a new gasket and a thin coating of RTV to reattach the cover. Make sure not to over torque the bolts to avoid bending the cover mating surface and causing eventual leaks. Refill the rear end via the fill plug located on top of the front passenger's side of the differential housing. Fill the rear until the fluid is just below the fill plug hole. It is usually necessary to do this by feel. Overfilling can result in leaks around the axle seals, so be sure to stop just shy of the fill hole.
To make the fluid easier to handle on a cold day, set the bottle of fluid in a tub or sink of hot water for 10-15 minutes before filling the differential. This makes the fluid pour much easier. You can use a turkey baster to put the fluid in the fill plug, but I prefer to get one of the little $3 pumps they sell at the auto parts stores. They work well and are cheap enough to be disposable (although they can be used several times if you want).
![]() ** TIP **
** TIP **
While you have the cover off is a good time to install a drain plug. The same plug as used in the transmission pan can be used here. Again, this allows much easier fluid changing and doesn't involve pulling the cover every time. In fact, you may never have to pull the cover again, just drain the fluid via the drain plug.
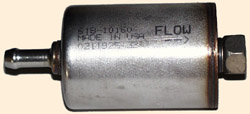 The fuel filter is a vital part of making sure that your turbo Regal remains healthy. It is located on the driver's side in front of the rear wheel and is attached to the inside of the frame rail. Before loosening the fittings to the filter, be sure to relieve the pressure in the system by means of the front test port on the front of the fuel rail. The worst fire hazard in the world is fuel spraying out under pressure in a fine stream.
Once pressure has been relieved, loosen the filter, noting the direction of the arrow stamped on the outside of the filter. The arrow is pointing to the front of the car, so make sure that your new filter is installed in the same manner Be sure all connections are leak free and tight before turning on the key and pressurizing the system.
As far as fuel pressure goes, be sure to check it periodically under load at Wide Open Throttle (WOT). A healthy stock pump should be able to deliver 53-55 psi of fuel pressure at 17-18 psi of boost. This can be checked by attaching a fuel pressure gauge to the fuel rail connection and taping it to the windshield. Have a friend observe fuel pressure as you drive and under WOT. 60-70 psi is desirable for mid-12 and faster cars, and will require an auxiliary pump or modified in-tank pump plus a Fuel Enhancer or "hot wiring" to achieve these pressures.
![]() ** TIP **
** TIP **
The Bosch 237 regulator will provide extra fuel pressure and was available on Sommerset Regals. However, the cost of an adjustable fuel pressure regulator is not that much more expensive and is well worth it in terms of giving you adjustability. There are several sources for adjustable fuel pressure regulators, including ATR, Cotton's Performance, Modern Muscle, Ron's Custom Auto, Conley's Performance Plus etc.
 To change the plugs in the turbo cars, be sure to use extra care to pull the plug wires off the plugs *BY GRIPPING THE BOOT ONLY*. Pulling on the wire will most likely result in pulling the wire out of the metal spark plug connector. Many auto parts stores sell plug wire pliers that make gripping the boot easier. It is a good idea to change your plug wires every 24,000 miles or so. I personally change them every season, since they are inexpensive and available locally. Plug wires should be of the spiral wound stainless steel wire and silicone insulation type. They should be 7.5-8.5 mm in diameter. When changing the wires, be sure to inspect the terminal posts on the coil pack for pitting, carbon streaks, and corrosion. Loose fitting wires can cause all of these problems due to the voltage arcing causing pitting and carbon streaks and trapping moisture causing corrosion. Take a small piece of fine metal sand paper and use it to polish the terminals to a bright shiny appearance. Next put a small amount of dielectric (tune up) grease on each terminal and inside each plug wire connector. Do the same for each plug wire boot and spark plug tip. This will prevent moisture, corrosion, and pitting in the future.
![]() ** TIP **
** TIP **
A handy item to use in this chore is a long (18"-24") extension bar and a spark plug socket with the universal joint on the end. These items are available at Sears and greatly simplify plug changing. Also handy are the plug boot puller tools that look like a funny set of pliers and grip the boot of wire to assist in pulling the wire off the plug without pulling the wire out of the boot. All these tools are also handy items when checking plugs on a hot engine after a run, since you don't need to have your hands down next to those hot exhaust headers. I recommend an AC CR43TS plug for mid 12 and slower cars and the AC CR42TS for faster cars... either should be gapped at a tight 0.035". If you run into fouling with the 42s, go back to the 43s.
 It is also a good idea to annually pull the intercooler out of the car and perform a thorough cleanup both inside and out. To remove the intercooler, remove the intake tube and loosen the hose clamps that attach the intercooler to the turbo outlet. Wiggle the hose away from the intercooler as far as possible.
Next, remove the front scoop by undoing the little screws that attach the housing to the intercooler. Then undo the two 10mm bolts on the passenger's side and the one 10mm bolt on the driver's side. The last bolt is on the underside of the intercooler on the passenger's side. Then carefully lift the intercooler out of the car.
Once the intercooler is out of the car, you can begin the cleanup procedure. First, spray an entire can of the oxygen sensor safe carb cleaner into the intercooler. Do this in a well ventilated area! "Slosh" the fluid around in the intercooler for several minutes. Then dump the fluid out and repeat until the resulting fluid is clean.
Once it is clean, I normally go to the car wash and use the high pressure washers to clean the fins and the outside of the intercooler. This removes the road grime, bugs, etc. from the fins and ensures that the intercooler has good air flow. Be sure to be careful not to bend or crush the fins when using the high pressure washer. You can also use the LOW pressure setting on the washer to rinse out the inside of the intercooler. This will remove any residue left from the carb cleaner.
Finally, I like to take my Wet/Dry Shop Vacuum and duct tape the hose to the intercooler tube. I then tape a thin shop rag over the other tube and let the vacuum run for an hour or so with the intercooler in the inverted position. This will remove most of any remaining moisture from the intercooler.
Reinstall the intercooler and intake tube. Now is a good time to set your Throttle Position Sensor (TPS). The TPS is the little gadget on the passenger side of the throttle body that tells the ECM the angle of the throttle blade. It attached by two screws in a slots that allow you to tilt and change the angle of the sensor. The easiest way to adjust the sensor is to find someone with a scan tool and adjust for 0.42-0.44 volts at idle and 4.75-4.9 volts at WOT.
![]() ** TIP **
** TIP **
Be careful working around the TPS because the little roll pin that rests against the throttle is delicate and can be easily bent or broken if a rag catches it. Now is also a good time to drain your coolant and do a cooling system flush. Be sure to check out the new environmentally safe coolants now available.